How to Bore Ball Lock Chuck Jaws: Clamp a Bar at the Jaw Roots
Clamp the jaws before boring
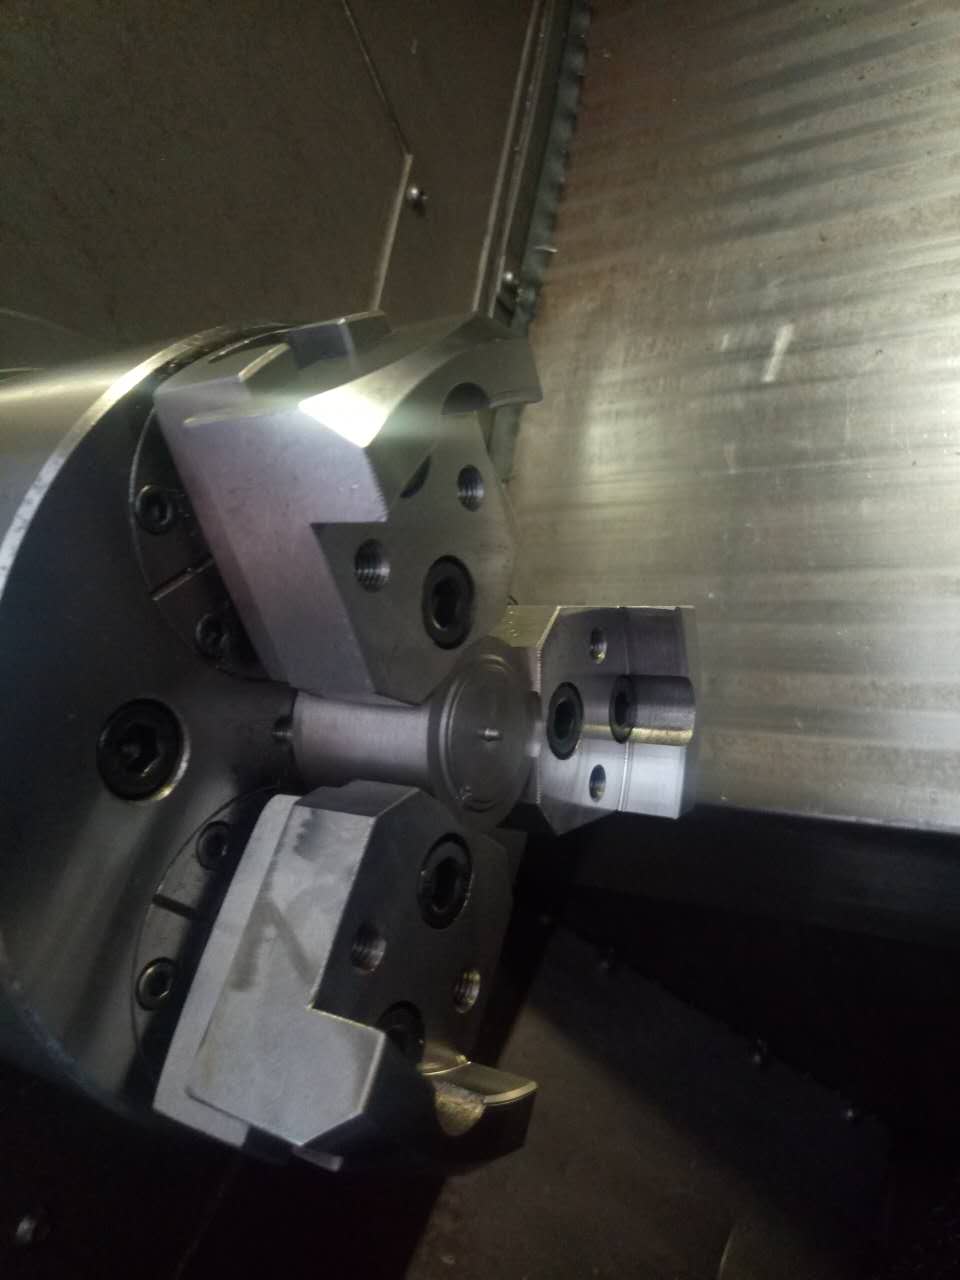
To bore Ball Lock chuck jaws, first choose a round bar to suit the required gripping diameter. Clamp it at the jaw roots. Keep the jaws clamped, then finish-bore the gripping arcs at the front. The workshop photo shows this setup.
The bar loads the jaws while leaving the front arcs open to the boring tool. Set the jaw position to match the position used when gripping the workpiece.
Why the jaws need to be under load
There is clearance between the jaws and the chuck. A released jaw can sit differently from a jaw under clamping load. Boring released jaws therefore cuts the arcs in a different state from the one used to hold the part.
Clamping the bar seats the mating surfaces and takes up the free clearance. The tool then cuts the gripping arcs with the jaws under load.
The jaw-boring steps
- Identify the workpiece gripping diameter and contact position. Choose the bar for that jaw position rather than using any bar that happens to fit.
- Clean the jaw roots and the bar contact surfaces. Place the bar in the centre and clamp it with each jaw at the roots.
- Check that the front gripping arcs remain accessible. Check the positions of the bar, jaws and tool so the boring path has enough room.
- Keep the bar clamped. Finish-bore the jaw arcs to the required gripping diameter and contact length.
- Release the bar and remove the chips. Clamp the actual workpiece. Check the contact position, gripping diameter and workpiece runout.
Why the bar sits at the jaw roots
A bar held at the front would occupy the surface that needs machining. Holding it at the roots loads the jaws and leaves the front arcs clear.
The bar diameter also sets how far the jaws open in the clamped state. Choose it using the target gripping diameter and jaw geometry. Being able to hold the bar is only part of the setup.
Use carbide gripping inserts for rough blanks
Castings and forgings usually have a rougher surface than machined parts. For these blanks, carbide gripping inserts are generally fitted at the jaw gripping arcs.
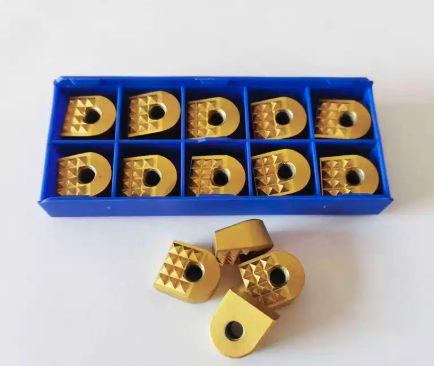
The second photo shows the toothed contact faces and mounting holes. The inserts sit where the jaws contact the blank. Their teeth grip the rough surface. These inserts hold the workpiece.
Boring a machinable jaw arc and fitting carbide gripping inserts are separate jobs. Bore the jaw body under clamping load to form the required arc. For rough blanks, position the gripping inserts at the workpiece contact points. The insert shape, mounting holes and seats need to match the jaws.
Find the chuck and jaw details
See the Ball Lock hydraulic chuck page for its structure and use with rough blanks. For jaws or gripping inserts, send us the gripping diameter, blank material, contact position and drawings of the jaw and insert seats.